My Commissioned Broadsword Project
After lengthy email consultation, I've begun making a broadsword on commission.
Because of the large size required, we had to use SAE1095 steel, the only type available in a large sheet.
Guard parts are made of Hot Rolled Steel sheet, 1/4 and 1/2 inch thick. They were cut out with an optical photo-eye guided, servo-controlled cutting torch. It follows a line on a paper pattern and cuts the same shape with the cutting torch head. It's a lot like a pantograph with a 1-to-1 copy ratio.
We cut out the blade shape by tracing around the edge of a thin, wooden pattern of the blade, using a hand-held plasma cutter torch. The pattern has to be 3/16 of an inch smaller than the size of the final piece because of the offset caused by the diameter of the plasma cutter torch.
After cutting, the pieces are rough and require a lot of cleanup and smoothing, either by hand file or by grinder. I used both methods.
I'm taking a lot of pictures as the project progresses. There are pictures of: (All Thumbnails)
Note: clicking on a thumbnail below will open the larger picture in a new browser window.
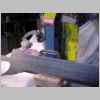
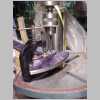
Cutting out with an optical photo-eye guided, servo-controlled cutting torch. Ray, the welding shop owner is running the machine, using the paper patterns I made for the shapes of the 1/4 and 1/2 inch thick hilt or guard pieces.
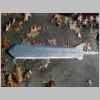
This is the blade piece from the wooden model of the sword, which the designer customer made for me to follow. Both pictures show the same pattern, but one also has my cat. The lower piece, without the white border to show the ground-away, beveled area, is the wooden pattern for cutting the blade. They both are made of thin plywood, probably old wall paneling.
10 - the long blade brace pieces and one of the arcs to be laminated onto the end of it. All cut out and ready for filing or grinding smooth.
15 - pieces partly ground
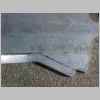
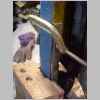
17, 18 - the edge of the long brace piece that runs down the center of the blade. Here is part of the edge, partly filed smooth but still showing some of the roughness left from the cutting torch.
19 - same as 17 & 18 with vise jaws padded with wood, and lots of steel filings covering the tops of the vise jaws.
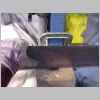
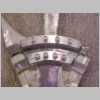
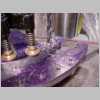
20, 21, 22 - the pommel is two pieces of 1/2 inch thick steel in a sort of hexagon shape but with a notch cut out of one side. These shots show the two pommel "layer" pieces clamped together to be filed smooth and even with each other.
23, 24 - the fairly straight edges of the pommel laminations are ready.
25 - pommel notch filing begun.
26 - notch filing done
27 - felt tip pen stripes drawn in notch. Now filing in the notch will leave the stripe in the low spots and remove it from the high spots. This helps even out the curve of the notch.
28 - notch filing in progress, also showing the coarse 1/2 round file and the vise jaws again.
29 - notch filing in progress, showing how the file has left ink in the low spots.
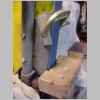
30 - torch cut edge in vise, with filings on the vise jaws
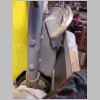
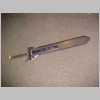
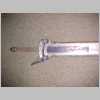
31, 32 - blade with guard parts lying in place on top
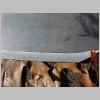
43, 44 - blade with bevel grinding. Shiny bevel shows irregular edge still needing work to make it straight.
35, 45 - the rough blade edge with center guideline and the beginning of the bevel grinding started
46 - the bevel ends right on the marked line
13 - the home-made belt grinder, mainly used for its contact wheel.
14 - a small 1 X 42 inch belt grinder for small detail work. This is very handy and is my most-used grinder for general-purpose shop use.
16 - coarse, flat file (and base of vise)
36 - the ruler, caliper and welder's soapstone for marking the grind lines
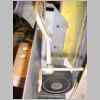
47 - the blade resting on the grinder rest. It's not quite in grinding position, though. Here the grinding belt would hit the upper edge, but doing that causes belts to break. I've already broken two, this blue one is a new replacement for the older brown ones. The blue ones are Norzon and cut much better than the brown aluminum oxide belts. But they cost more, too, about $5 each. Expensive to break!
48 - the blade in actual grinding position
49 - The Secret! Do you see the little block of aluminum clamped to the grinder frame? That keeps the blade at a constant angle in relation to the grinding belt and makes an even bevel angle possible to grind by hand.
50 - the secret shown from the other (left hand) side.
51 - the blade in actual grinding position, resting against the aluminum angle stop block. The blade is hard to see, but it's there!
52 - the blade in actual grinding position, resting against the aluminum angle stop block, shown from the other (right hand) side. The blade is hard to see, but it's there!
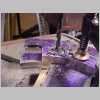
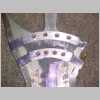
53, 58 - close-up of hilt trial assembly
54, 55, 59 - match drilling (thru multiple pieces so holes line up) of hilt parts
56, 57 - overall view of first trial assembly
Other:
37-42 - skipped these numbers
------home ----- back to Swordmaking Page ----- created October 27, 2003; updated December 12, 2003
further updates will come slowly and infrequently